

Table of Contents
- Why Hanging Canvas Art Safely Matters
- What You'll Need Before You Start
- Canvas Art Hanging Height: Finding the Right Eye Level
- How to Hang Canvas Without Nails or Damage
- Step-by-Step Installation Guide for Canvas Art
- How to Prevent Canvas Art Fading and Preserve Your Investment
- Common Mistakes to Avoid When Hanging Canvas
- Troubleshooting: Keeping Your Canvas Level and Secure
Last Updated: August 21, 2026
Why Hanging Canvas Art Safely Matters
Falls from height remain a serious concern in domestic settings. According to The Royal Society for the Prevention of Accidents (RoSPA), around 6,000 people are hospitalised each year in the UK from ladder-related accidents at home. When you're hanging canvas art safely, you're protecting yourself and your household from preventable injury while ensuring your investment survives for decades rather than deteriorating within months.
This guide covers the practical steps to hang canvas art safely, from selecting the right hardware to positioning your work at gallery-standard eye level. Whether you're installing a lightweight print or a heavy framed canvas, the principles remain consistent: measure twice, use appropriate fixings, and verify everything is level before stepping down from your ladder.
What You'll Need Before You Start
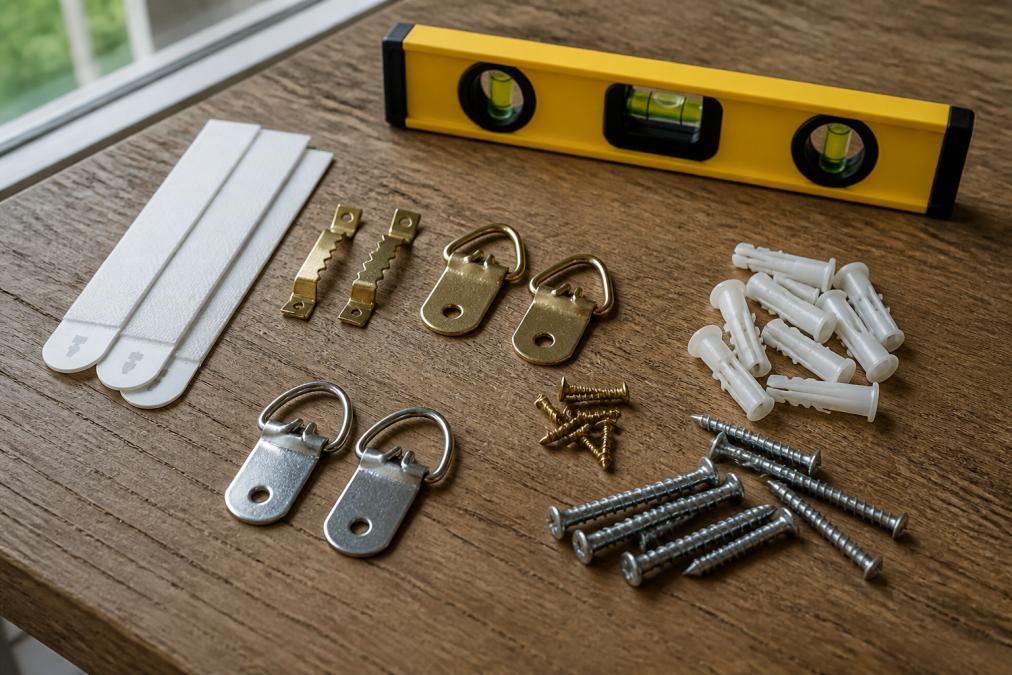
Before you begin, gather these essentials to prevent mid-project scrambling and ensure correct installation on the first attempt.
Basic tools:
- Spirit level (60cm model works for most domestic installations)
- Measuring tape (at least 3 metres)
- Pencil for marking
- Stud finder (optional but recommended for wall studs)
- Hammer or cordless drill
Hardware options:
- Picture hooks and drywall anchors
- Adhesive strips rated for your canvas weight
- French cleats for heavier pieces
- Sawtooth hangers or D-rings with hanging wire
Safety equipment:
- Sturdy ladder or step stool
- Gloves for handling hardware
- Safety glasses if drilling
The weight of your canvas determines which hardware you'll need. Check the frame's specifications, most quality canvas prints list their weight clearly. This information guides your choice between lightweight adhesive strips and load-bearing picture hooks or French cleats.
Canvas Art Hanging Height: Finding the Right Eye Level
The centre of your canvas should sit at approximately 145-152 centimetres from the floor, the standard eye-level height used by galleries and interior designers worldwide. To find your eye level, stand facing the wall and look straight ahead without tilting your head. Mark this height lightly with pencil. Measure from the top of your canvas frame to its centre point, then subtract that measurement from your eye-level mark to find where the top of the frame should sit.
When hanging canvas above furniture, the bottom edge should sit 15-25 centimetres above the back of a sofa, desk, or console table. For multiple canvases, maintain consistent spacing of 5-15 centimetres between frames to create a cohesive gallery wall effect.
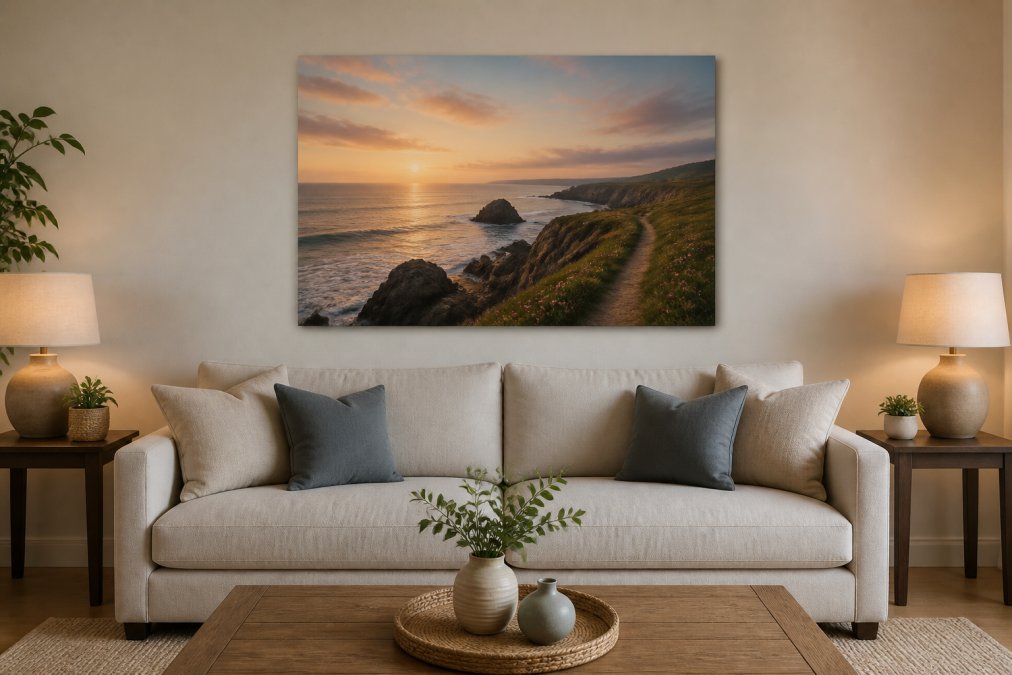
Artwork positioned above eye level feels disconnected and loses its impact. When you hang canvas art safely at the correct height, it becomes part of the room's visual conversation rather than an afterthought on an empty wall.
How to Hang Canvas Without Nails or Damage
Renters and those hesitant about permanent wall modifications have several effective options for hanging canvas art safely without creating holes.
Adhesive Strips for Lightweight Canvas
Adhesive strips offer the simplest damage-free approach for canvases under 7 kilograms. These weight-rated strips bond directly to the back of the frame and the wall surface, distributing weight evenly.
How to use adhesive strips correctly:
- Clean both the wall and the back of the frame with a dry microfiber cloth to remove dust and debris
- Check the strip's weight rating, it must exceed your canvas weight by at least 25 percent
- Apply strips to the frame's back corners, following the manufacturer's spacing instructions
- Press firmly for 30 seconds to activate the adhesive bond
- Wait the full curing time (typically 24 hours) before hanging
- Position the canvas on the wall and press firmly for 60 seconds
The critical failure point occurs when weight calculations are wrong or the wall surface is unsuitable. Textured wallpaper, fresh paint, or damp walls reduce adhesive effectiveness dramatically. For renters, adhesive strips are ideal because removal leaves minimal residue that cleans away with a plastic scraper and rubbing alcohol.
Picture Hooks and Drywall Anchors
Picture hooks combined with drywall anchors create a more permanent solution suitable for canvases between 7 and 20 kilograms. These hooks distribute weight across a larger wall area than nails alone.
Installation steps:
- Mark your desired hanging height with a light pencil line
- Position the picture hook so its hanging point aligns with your mark
- Drive the nail at a slight upward angle (approximately 45 degrees) into the wall
- For drywall, insert the anchor into a pre-drilled hole, then drive the hook into the anchor
- Hang the canvas by its wire or sawtooth hanger onto the hook
- Use a spirit level to verify the canvas hangs straight
Drywall anchors come in several types: plastic expansion anchors (budget-friendly, suitable for lighter loads), toggle bolts (excellent for medium-weight canvases), and heavy-duty anchors (for artwork exceeding 15 kilograms). Match the anchor type to your canvas weight and wall construction. The advantage of picture hooks is their adjustability, if your canvas hangs slightly crooked, you can remove it and reposition the hook without creating additional holes.
French Cleats for Heavy Artwork
French cleats provide professional-grade security for canvases heavier than 20 kilograms or for valuable pieces requiring maximum stability. A French cleat consists of two interlocking wooden strips: one attached to the wall studs, the other to the back of the frame.
How French cleats work:
- Locate wall studs using a stud finder, this is non-negotiable for heavy artwork
- Attach the wall-mounted cleat to studs using appropriate fixings (typically 75mm screws into studs)
- Attach the matching cleat to the back of the canvas frame
- Hang the frame by sliding its cleat over the wall-mounted cleat
- Verify alignment with a spirit level
French cleats distribute weight across multiple studs, eliminating the risk of drywall failure. They're nearly invisible once the canvas hangs in place, creating a clean, gallery-quality installation.
Step-by-Step Installation Guide for Canvas Art
Follow this systematic approach to hang canvas art safely every time.
Step 1: Measure and mark the wall (Time: 10 minutes)
Use your measuring tape to locate wall studs if you're using heavy-duty fixings. Mark stud positions lightly with pencil. Determine your canvas's centre point by measuring from the frame's top edge. Mark your desired hanging height on the wall (145-152 centimetres for eye level, or adjusted for furniture placement). Draw a light horizontal line at this height to guide hook placement.
Step 2: Prepare the canvas (Time: 5 minutes)
Inspect the back of the frame for dust, debris, or loose fixings. Use a soft brush to clean the back gently. Check that any existing hanging hardware, sawtooth hangers, D-rings, or wire, is secure and undamaged. This preparation typically requires only a visual inspection.
Step 3: Install the wall fixings (Time: 15-20 minutes)
For adhesive strips: clean the wall surface thoroughly and apply strips according to the manufacturer's instructions, waiting the full curing time before proceeding.
For picture hooks: position the hook at your marked height and drive the nail at a 45-degree upward angle. Test the hook's security by pulling downward gently.
For French cleats: locate studs, attach the wall cleat securely using appropriate fixings, then attach the matching cleat to the frame's back.
Step 4: Hang the canvas (Time: 5 minutes)
Carefully lift the canvas and position it on the wall fixings. For adhesive strips or picture hooks, ensure the hanging wire or sawtooth hanger sits properly on the hardware. For French cleats, slide the frame's cleat smoothly over the wall-mounted cleat until it sits flush.
Step 5: Verify alignment (Time: 5 minutes)
Place the spirit level against the top and side edges of the frame. Adjust as needed by slightly lifting one corner and repositioning. Check both horizontal and vertical alignment, the spirit level's bubble should sit centred in both directions.
Step 6: Final inspection (Time: 5 minutes)
Step back and view the canvas from different positions in the room. Verify it hangs at eye level and appears visually balanced with surrounding furniture. Gently press the canvas against the wall to confirm it's secure. If using adhesive strips, allow the full 24-hour curing period before considering the installation complete.
How to Prevent Canvas Art Fading and Preserve Your Investment
Canvas prints fade when exposed to direct sunlight, ultraviolet light, or excessive heat. Hang canvas art on north-facing walls or areas that receive only indirect sunlight. If your preferred wall receives direct sunlight, consider using UV-filtering glass or acrylic in a frame, which blocks approximately 97-99 percent of ultraviolet rays ([EXTERNAL_LINK: American Alliance of Museums | aam-us.org]).
Canvas art lasts longest in stable environments with temperatures between 17.8 and 23.9 degrees Celsius and humidity between 40 and 55 percent ([EXTERNAL_LINK: Smithsonian Museum Conservation Institute | si.edu]). Avoid hanging canvas above radiators, fireplaces, or air conditioning vents where temperature fluctuations occur.
Dust your canvas monthly using a soft microfiber cloth or clean makeup brush with gentle, sweeping motions. Never use water, cleaning solutions, or abrasive materials, as these damage the print permanently.
Common Mistakes to Avoid When Hanging Canvas
Mistake 1: Hanging artwork too high or too low
Artwork positioned above eye level feels disconnected from the room. Always measure to eye level (145-152 centimetres) as your baseline, adjusting only for specific furniture placement.
Mistake 2: Using inadequate fixings for the canvas weight
Selecting fixings rated below your canvas weight creates a safety hazard. Always choose fixings rated 25-50 percent above your canvas's actual weight.
Mistake 3: Hanging on unsuitable wall surfaces
Adhesive strips fail on textured wallpaper, fresh paint, or damp walls. Picture hooks struggle with hollow walls lacking studs. Assess your wall type before selecting hardware.
Mistake 4: Skipping the level check
A spirit level takes 5 minutes and prevents crooked artwork. Always verify both horizontal and vertical alignment.
Mistake 5: Mixing hardware types in multi-canvas installations
When hanging several canvases together, use the same hardware type for all pieces to ensure visual consistency and even weight distribution.
Mistake 6: Ignoring temperature and humidity fluctuations
Canvas responds to environmental changes by expanding and contracting. Kitchens, bathrooms, and rooms with radiators accelerate fading and can warp frames. Choose stable locations whenever possible.
Troubleshooting: Keeping Your Canvas Level and Secure
Canvas hangs crooked despite using a spirit level:
Remove the canvas and inspect the wall fixings. Picture hooks sometimes sit at slight angles if the wall surface is uneven. Reposition the hook, ensuring it's perfectly vertical before hanging the canvas again.
Canvas won't stay level when hung on wire:
Inspect the D-rings or sawtooth hangers on the frame's back, they should sit at equal heights. If one is higher than the other, the canvas naturally tilts. Adjust the hardware position on the frame back.
Canvas sags or pulls away from the wall over time:
This indicates the fixings are failing under load. For adhesive strips, remove the canvas, clean the wall thoroughly, and reinstall with fresh strips. For picture hooks, upgrade to a heavier-duty anchor rated for your canvas weight.
Small cracks appear in the frame corner:
This suggests the canvas is hanging under uneven stress, typically because it's not level. Rehang the canvas using a spirit level to ensure perfect alignment.
Adhesive strip residue remains on the wall after removal:
Use a plastic scraper to gently remove dried adhesive, then wipe the area with rubbing alcohol on a soft cloth. Most residue cleans away easily within 2-3 minutes.
Hanging canvas art safely protects your investment and creates a polished, intentional look in any room. The techniques covered here, measuring to eye level, selecting appropriate fixings, and verifying alignment, transform what seems like a daunting task into a straightforward project you can complete confidently. Get started with paints2prints and transform your space with artwork that hangs securely and looks gallery-quality for years to come.
| Installation Method | Best For | Permanence | Damage Level |
|---|---|---|---|
| Adhesive strips | Lightweight canvas under 7kg, renters | Temporary to semi-permanent | Minimal to none |
| Picture hooks + anchors | Medium canvas 7-20kg, drywall | Semi-permanent | Small nail holes |
| French cleats | Heavy canvas over 20kg, valuable art | Permanent | Stud-dependent, minimal |
| Sawtooth hangers | Standard framed canvas, lightweight | Semi-permanent | Single nail hole |
=== FAQ ANSWERS (audit these too, same rules) ===
[1] Q: What is the best way to hang a canvas artwork? A: The best method depends on your canvas weight and wall type. For lightweight pieces under 5 kg, weight-rated adhesive strips offer a damage-free option. For heavier canvas (5-10 kg), use picture hooks or drywall anchors rated 25-50% above the artwork's weight. For very heavy pieces over 10 kg, a French cleat provides professional-grade security. Always use a spirit level to ensure horizontal stability and measure twice before installation.
[2] Q: How do you ensure a canvas print is level? A: Use a spirit level placed against the top and sides of your canvas frame after installation. Mark your hanging points precisely with a pencil before drilling or inserting hooks. If your canvas has a sawtooth hanger or D-ring, ensure the mounting hardware sits flush against the wall. Check alignment from multiple angles and distances, step back at least 2 metres to verify the canvas appears perfectly level to the eye.
[3] Q: Can I hang canvas art without damaging my walls? A: Yes. Weight-rated adhesive strips work well for canvas under 5 kg on most wall surfaces without leaving holes. For heavier pieces, use picture hooks that leave only a pin-sized hole, or adhesive-based solutions designed for damage-free hanging. Renters benefit from these methods since they avoid landlord concerns. Always test adhesive strips on a small area first and follow the manufacturer's weight guidelines to prevent failure.
[4] Q: What causes canvas art to fade, and how can I prevent it? A: Direct sunlight, UV rays, and heat cause irreversible fading in canvas prints. Protect your artwork by hanging it on north-facing walls away from windows and direct light. UV-filtering glass or acrylic blocks 97-99% of harmful rays if your canvas is framed. Maintain stable indoor temperatures between 17-24°C and humidity between 40-55% to prevent environmental damage. Avoid hanging canvas above radiators, fireplaces, or in high-humidity areas like bathrooms.
Frequently Asked Questions
Q: What is the best way to hang a canvas artwork?
A: The best method depends on your canvas weight and wall type. For lightweight pieces under 5 kg, weight-rated adhesive strips offer a damage-free option. For heavier canvas (5-10 kg), use picture hooks or drywall anchors rated 25-50% above the artwork's weight. For very heavy pieces over 10 kg, a French cleat provides professional-grade security. Always use a spirit level to ensure horizontal stability and measure twice before installation.
Q: How do you ensure a canvas print is level?
A: Use a spirit level placed against the top and sides of your canvas frame after installation. Mark your hanging points precisely with a pencil before drilling or inserting hooks. If your canvas has a sawtooth hanger or D-ring, ensure the mounting hardware sits flush against the wall. Check alignment from multiple angles and distances, step back at least 2 metres to verify the canvas appears perfectly level to the eye.
Q: Can I hang canvas art without damaging my walls?
A: Yes. Weight-rated adhesive strips work well for canvas under 5 kg on most wall surfaces without leaving holes. For heavier pieces, use picture hooks that leave only a pin-sized hole, or adhesive-based solutions designed for damage-free hanging. Renters benefit from these methods since they avoid landlord concerns. Always test adhesive strips on a small area first and follow the manufacturer's weight guidelines to prevent failure.
Q: What causes canvas art to fade, and how can I prevent it?
A: Direct sunlight, UV rays, and heat cause irreversible fading in canvas prints. Protect your artwork by hanging it on north-facing walls away from windows and direct light. UV-filtering glass or acrylic blocks 97-99% of harmful rays if your canvas is framed. Maintain stable indoor temperatures between 17-24°C and humidity between 40-55% to prevent environmental damage. Avoid hanging canvas above radiators, fireplaces, or in high-humidity areas like bathrooms.
This article was written using GrandRanker
0 comments